Drupal Support
Displaying 1 - 20 of 46How to display a message in Drupal 9, 10, 11
How to display a message in Drupal 9
Messages can be displayed using Drupal Messenger service,
\Drupal::messenger()->addMessage('This is a custom message', 'custom');
\Drupal::messenger()->addError(t('This is an error message, red in color'));
\Drupal::messenger()->addStatus(t('This is a status message, green in color'));
\Drupal::messenger()->addWarning(t('This is a warning message, yellow in color'));
Code Snippet
\Drupal::messenger()->addMessage('This is a custom message', 'custom');
\Drupal::messenger()->addError(t('This is an error message, red in color'));
\Drupal::messenger()->addStatus(t('This is a status message, green in color'));
\Drupal::messenger()->addWarning(t('This is a warning message, yellow in color'));External Resources
React Resources And Reference, especially when integrating with Drupal
This article is a collection of important links and resources for React beginners and React experts who wish to integrate between them, It will include reference resources, links, images, and even media.
Please comment with every important link.
DrupalVIP technical notebook & support
REACT: Controlled or Uncontrolled components
The form is one of the most-used HTML elements in web development.
Since the introduction of React, the way forms have been handled has changed in many ways.
In React, there are two ways to handle form data in our components:
The first way is the Controlled Component:
We handle form data by using the state within the component to handle the form data.
The Second way is Uncontrolled Component:
We let the DOM handle the form data by itself in the component.
Code Snippet
Controlled Component
import React, { Component } from 'react';

class App extends Component {
    state = {
        message: ''
    }
    updateMessage = (newText) => {
        console.log(newText);
        this.setState(() => ({
            message: newText
        }));
    }
    render() {
        return (
            <div className="App">
                <div className="container">
                    <input type="text"
                        placeholder="Your message here.."
                        value={this.state.message}
                        onChange={(event) => this.updateMessage(event.target.value)}
                    />
                    <p>the message is: {this.state.message}</p>
                </div>
            </div>
        );
    }
}
Tag-Based Caching IN Drupal Views
tag-based caching in Drupal views
Tag-based caching enhances the performance of your website by allowing fine-grained invalidation of cached content.
This is particularly important for dynamic websites where content changes frequently, but you still want to leverage caching to reduce server load and improve page load times.
Messenger Api: How to set message
Drupal set message was deprecated in Drupal 8.5 and will be removed before Drupal 9.
Time for a roundup of this new API and how to use it.
Code Snippet
\Drupal::messenger()->addMessage('This is a regular message');
\Drupal::messenger()->addStatus('This is a status message, meaning status is OK or successful (green).');
\Drupal::messenger()->addError('This is an error message (red)');
\Drupal::messenger()->addWarning('This is a warning message (orange)');
Sending JSON with Basic Authentication Credentials
To post JSON to a server with Basic Authentication credentials, you need to make an HTTP POST or PUT request, include the JSON in the body of the HTTP message, and pass the "Authorization: Basic [token]" HTTP header to the server.
The [token] is a Base64 encoded string of user credentials in the form of a login:password string.
In this POST JSON with a Basic Authentication Credentials Example, we send a POST request with JSON body and "Authorization: Basic [token]" header to the ReqBin echo URL.
Code Snippet
<script>
      var USERNAME="admi";
      var PASSWORD="chanud";

      var person = {
        firstName:"tester2",
        lastName:"drupal",
        userName:"tester2drupal",
        eMail:"teter2@drupalvip.com",
        pass1:"teter2drupal",
        passConfirm:"teter2drupal",
        role:"Affiliate"
      };

      $.ajax({
        type: "POST",
        url: 'https://mydomain/api/route',
        dataType: 'json',
        headers: {
         "Authorization": "Basic " + btoa(USERNAME + ":" + PASSWORD)
        },
        data: person,
        //data: JSON.stringify(person),
        success: function (data) {
          $("response").html(data.msg);
        },
      });
    </script>
Drupal 7 to Drupal 9 in an hour, is it possible
Countless blog posts have been written about migrating from Drupal 7 to 8/9/10.
Some recommend how to begin breaking down this rather overwhelming endeavor into manageable pieces.
Others provide concrete technical recommendations for very specific Drupal 7 setups.
DrupalVIP technical notebook & support
How To Attach Library To A Specific Content Type
If you need to upload a library with a module during its operation, in Drupal it's called attaching file.
Attaching a library can be done in several ways depending on your needs.
Remember that the library is always registered by its module or theme name followed by the library name.
DrupalVIP technical notebook & support
Code Snippet
function rwcenter_page_attachments(array &$attachments) {
	$attachments['#attached']['library'][] = 'rwcenter/content';

    $node = \Drupal::routeMatch()->getParameter('node') ?? \Drupal::routeMatch()->getParameter('node_preview');
    if (is_null($node)) {}
    else {
    	if ($node->getType()=='rwcenter') {
        	$attachments['#attached']['library'][] = 'rwcenter/content';
        }
    }
}Success Message After Submitting Form
In building a custom form you must keep in mind a few issues:
elements, functionality, and response for best user experience
DrupalVIP technical notebook & support
Code Snippet
public function submitForm(array &$form, FormStateInterface $form_state) {
  $this->logger('user')->notice('Deleted %ip', ['%ip' => $this->banIp,]);
  $this->messenger()->addStatus($this->t('The IP address %ip was deleted.', [    '%ip' => $this->banIp,  ]));
  $form_state->setRedirectUrl($this->getCancelUrl());
}
Introduction to Web Accessibility
When websites and web tools are properly designed and coded, people with disabilities can use them.
However, many sites and tools are currently developed with accessibility barriers that make them difficult or impossible for some people to use.
Making the web accessible benefits individuals, businesses, and society.
International web standards define what is needed for accessibility.
DrupalVIP technical notebook & support
Open Ajax Modal Dialog from Controller
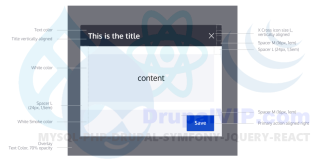
Dialogs are often called dialog boxes, modal windows, or pop-up windows.
Whatever you call them, they are a quick and easy way to display additional information without reloading the entire page.
Dialog boxes can display just some static text, any node or form of your page, a views page, or any custom markup you'll feed them.
DrupalVIP technical notebook & support
Code Snippet
        public function requestResidenceUpload(Request $request): AjaxResponse {
            $arg = $request->get('arg1');

            // Add an AJAX command to open a modal dialog with the form as the content.
            $response = new AjaxResponse();
            $modal_form = $this->formBuilder->getForm('Drupal\mymodule\Form\MyForm', $arg);
            $response->addCommand(new OpenModalDialogCommand('Upload', $modal_form, ['width' => 600, 'height'=>600]) );
            return $response;
} Drupal module info file
Drupal uses .info files to store metadata about themes and modules.
For modules, the .info file is used for:
- Rendering information on the Drupal Web GUI administration pages;
- Provide criteria to control module activation and deactivation;
- Notifying Drupal about the existence of a module;
- Specifying the module's dependencies on other Drupal projects
for general administrative purposes in other contexts.
This .info file is required for the system to recognize the presence of a module.
Code Snippet
name: Hello World Module
description: Creates a page showing "Hello World".
package: Custom

type: module
core_version_requirement: ^9.4 || ^10

dependencies:
  - drupal:link
  - drupal:views
  - paragraphs:paragraphs
  - webform:webform (>=6.1.0)

test_dependencies:
 - drupal:image

configure: hello_world.settings
configure_parameters:
  pluginId: hello_world_plugin

php: 8.0

hidden: true
required: true

# Set the module lifecycle status deprecated
lifecycle: deprecated
lifecycle_link: https://www.drupal.org/node/3223395#s-aggregator

# Note: do not add the 'version' or 'project' properties yourself.
# They will be added automatically by the packager on drupal.org.
# version: 1.0
# project: 'hello_world'
entityQuery intro and examples
A node can include a few fields.
Every field is a table in the database.
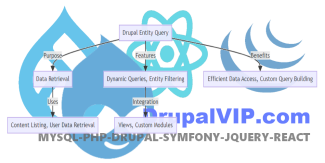
So If I need to find a specific node, doing it with SQL means doing complicated queries, which might have few joins and many conditions, The Drupal platform created a simpler way to deal with it: EntityQuery
DrupalVIP technical notebook & support
Code Snippet
$query = \Drupal::entityQuery('node')
  ->condition('type', 'page')
  ->condition('field_some_field', 14)
  ->accessCheck(TRUE);
$results = $query->execute();
