Code Snippet
Displaying 1 - 15 of 15Messenger Api: How to set message
Drupal set message was deprecated in Drupal 8.5 and will be removed before Drupal 9.
Time for a roundup of this new API and how to use it.
Code Snippet
\Drupal::messenger()->addMessage('This is a regular message');
\Drupal::messenger()->addStatus('This is a status message, meaning status is OK or successful (green).');
\Drupal::messenger()->addError('This is an error message (red)');
\Drupal::messenger()->addWarning('This is a warning message (orange)');
Creating a Block in Drupal 10 Programmatically
Drupal's great feature is Custom Block. blocks are easy and fast to set in any region, with Drupal9 you can even set the same block in a few regions.
There are a few technical options to create a block, here we will overview the programming option only.
so, what is a block?
Blocks are chunks of content with ID and classes which can be placed in manipulated within the page.
Code Snippet
namespace Drupal\my_module\Plugin\Block;

use Drupal\Core\Block\BlockBase;
use Drupal\Core\Block\BlockPluginInterface;
use Drupal\Core\Form\FormStateInterface;
use Drupal\Core\Session\AccountInterface;
use Drupal\Core\Access\AccessResult;
use Drupal\Core\Cache\UncacheableDependencyTrait;

/**
 * Provides a 'SetTask' Block.
 *
 * @Block(
 *   id = "dashboard_newtask_block",
 *   admin_label = @Translation("Dashboard New Task"),
 *   category = @Translation("DrupalVIP"),
 * )
 */
class NewTaskBlock extends BlockBase implements BlockPluginInterface {
    use UncacheableDependencyTrait;

    /**
    * {@inheritdoc}
    */
    public function build() {
        // Do NOT cache a page with this block on it.
        \Drupal::service('page_cache_kill_switch')->trigger();
        // build from form
        $build = \Drupal::formBuilder()->getForm('Drupal\drupalvip_dashboard\Form\NewTaskForm');
        $build['#attributes']['class'][] = 'my_class';
        $build['#cache']['max-age'] = 0;
        $build['#cache']['contexts'] = [];
        $build['#cache']['tags'] = [];
        return $build;
    }

    /**
    * {@inheritdoc}
    */
    public function blockForm($form, FormStateInterface $form_state) {
        $form = parent::blockForm($form, $form_state);
        $config = $this->getConfiguration();
        $form['block_note'] = [
            '#type' => 'textfield',
            '#title' => $this->t('Note'),
            '#description' => $this->t('block note '),
            '#default_value' => isset($config['block_note']) ? $config['block_note'] : '',
        ];
        return $form;
    }

    /**
    * {@inheritdoc}
    */
    public function blockSubmit($form, FormStateInterface $form_state) {
        parent::blockSubmit($form, $form_state);
        $values = $form_state->getValues();
        $this->configuration['block_note'] = $values['block_note'];
    }

} // end of class
Custom Block: Create fast and simple
Blocks are individual pieces of your site’s web page layout. They are placed inside the regions of your theme, and can be created, removed, and rearranged in the Block layout (admin/structure/block) administration page.
Examples of blocks include the Who’s online listing, the main navigation menu, and the breadcrumb trail. The main page content is also a block.
Code Snippet
<?php

namespace Drupal\basic_module\Plugin\Block;

use Drupal\Core\Block\BlockBase;

/**
 * Block annotation
 *
 * @Block(
 *      id = "basic_block",
 *      admin_label = @Translation("Basic Block"),
 * )
 */
class BasicBlock extends BlockBase {
   /**
     * {@inheritDoc}
     */
    public function build() {
        $markup = '';
        $markup .= '<div>';
        $markup .= '    <p>Anything can come here: code, variables, html, etc.  </p>' ;
        $markup .= '</div>';
        return [
            '#type' => 'markup',
            '#markup' => $markup,
        ];
    }

} // end of class
Success Message After Submitting Form
In building a custom form you must keep in mind a few issues:
elements, functionality, and response for best user experience
DrupalVIP technical notebook & support
Code Snippet
public function submitForm(array &$form, FormStateInterface $form_state) {
  $this->logger('user')->notice('Deleted %ip', ['%ip' => $this->banIp,]);
  $this->messenger()->addStatus($this->t('The IP address %ip was deleted.', [    '%ip' => $this->banIp,  ]));
  $form_state->setRedirectUrl($this->getCancelUrl());
}
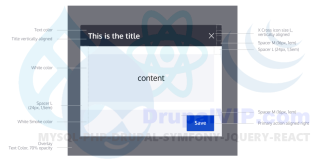
Open Ajax Modal Dialog from Controller
Dialogs are often called dialog boxes, modal windows, or pop-up windows.
Whatever you call them, they are a quick and easy way to display additional information without reloading the entire page.
Dialog boxes can display just some static text, any node or form of your page, a views page, or any custom markup you'll feed them.
DrupalVIP technical notebook & support
Code Snippet
        public function requestResidenceUpload(Request $request): AjaxResponse {
            $arg = $request->get('arg1');

            // Add an AJAX command to open a modal dialog with the form as the content.
            $response = new AjaxResponse();
            $modal_form = $this->formBuilder->getForm('Drupal\mymodule\Form\MyForm', $arg);
            $response->addCommand(new OpenModalDialogCommand('Upload', $modal_form, ['width' => 600, 'height'=>600]) );
            return $response;
        }
How to pass a Function as a Prop
Props or properties in react are a functional argument by which different components communicate with each other.
Props is just a data/information that allows us to pass in JSX tags.
With the help of props, we can pass values like JavaScript objects, arrays or functions, etc.
DrupalVIP technical notebook & support
Code Snippet
import React from "react";

function Course(props) {
  return (
    <div>
      <ul>
        <li>{props.courseName}</li>
      </ul>
    </div>
  )
}

function App() {
  return (
    <div>
      <h1>Guvi Courses</h1>
      <Course courseName="Full Stack Development"  />
    </div>
  );
}

export default App;
Fetching data using inbuilt fetch API
All modern browsers come with an inbuilt fetch Web API, which can be used to fetch data from APIs.
In this tech article, I will to show you how to do fetching data from the JSON Server APIs.
DrupalVIP technical notebook & support
Code Snippet
import React, { useEffect, useState } from "react"

const UsingFetch = () => {
  const [users, setUsers] = useState([])

  const fetchData = () => {
    fetch("https://jsonplaceholder.typicode.com/users")
      .then(response => {
        return response.json()
      })
      .then(data => {
        setUsers(data)
      })
  }

  useEffect(() => {
    fetchData()
  }, [])

  return (
    <div>
      {users.length > 0 && (
        <ul>
          {users.map(user => (
            <li key={user.id}>{user.name}</li>
          ))}
        </ul>
      )}
    </div>
  )
}

export default UsingFetch
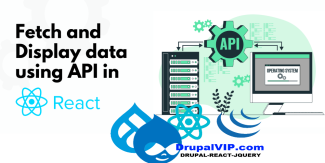
Fetch and display data from API in React js
When you develop an application, you will often need to fetch data from a backend or a third-party API.
In this article, I will try to go through the process of fetching and displaying data from a server using React Fetch.
DrupalVIP technical notebook & support
Code Snippet
import React, { useEffect, useState } from "react";

function handleClick() {
    alert('You clicked node ');
}

export default function RWTaskIssues({nodeid}) {
    const FetchAPI = '/rwtask/issues?task=' + nodeid + '&op=get';
    console.log("api fetch: " + FetchAPI);

    const [issues, setIssues] = useState([]);
    const fetchData = () => {
        fetch(FetchAPI)
            .then(response => {
                return response.json();
            })
            .then(response => {
                console.log("response data: " + response.data.items);
                setIssues(response.data.items);
            });
    };

    useEffect( () => {
        fetchData();
    }, []) ;

    console.log("issues data: " + issues);

    return (
        <div className="block block-layout-builder block-field-blocknoderwtaskfield-rwtask-issue">
            <h2 className="block-title">תיאור הבעיה</h2>
            <div className="block-content">
                {issues.length > 0 && (
                    <div className="field field-name-field-rwtask-issue field-type-text-long field-label-hidden field-items">
                        {issues.map(item => (
                            <div key={item.key} className="field-item" dangerouslySetInnerHTML={{__html: item.value}} />
                        ) ) }
                    </div>
                )}
                <button onClick={handleClick}>
                    Edit
                </button>
            </div>
        </div>
    );
}
Open Ajax Dialog with JavaScript
Drupal is fully integrated with jQuery and Ajax, but still suffers from a lack of documentation,
Here I'm going light things a bit, helping you to create & understand how drupal creates pop-up dialog from the js script running on the current page.
Code Snippet
var ajaxSettings = {
  url: '/node/1',
  dialogType: 'modal',
  dialog: { width: 400 },
};
var myAjaxObject = Drupal.ajax(ajaxSettings);
myAjaxObject.execute();
Custom controller with JSON response
how to create a custom controller with JSON response in Drupal 8.
this might work on Drupal 9 and 10, but I never tested it on these versions.
Code Snippet
use Symfony\Component\HttpFoundation\JsonResponse;

/**
 * Class JsonApiArticlesController
 * @package Drupal\mymodule\Controller
 */
class JsonApiArticlesController {

  /**
   * @return JsonResponse
   */
  public function index() {
    return new JsonResponse([ 'data' => $this->getData(), 'method' => 'GET', 'status'=> 200]);
  }

  /**
   * @return array
   */
  public function getData() {

    $result=[];
    $query = \Drupal::entityQuery('node')
      ->condition('type', 'article')
      ->sort('title', 'DESC');
    $nodes_ids = $query->execute();
    if ($nodes_ids) {
      foreach ($nodes_ids as $node_id) {
        $node = \Drupal\node\Entity\Node::load($node_id);
        $result[] = [
          "id" => $node->id(),
          "title" => $node->getTitle(),
        ];
      }
    }
    return $result;
  }
}
use Symfony\Component\HttpFoundation\JsonResponse;
// if you know the data to send when creating the response
$response = new JsonResponse(['data' => 123]);
// if you don't know the data to send or if you want to customize the encoding options
$response = new JsonResponse();
// ...
// configure any custom encoding options (if needed, it must be called before "setData()")
//$response->setEncodingOptions(JsonResponse::DEFAULT_ENCODING_OPTIONS | \JSON_PRESERVE_ZERO_FRACTION);
$response->setData(['data' => 123]);
// if the data to send is already encoded in JSON
$response = JsonResponse::fromJsonString('{ "data": 123 }');Requests and Responses the Drupal way
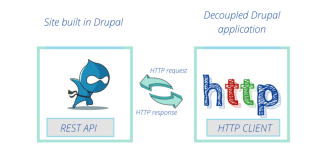
HTTP is all about requests and responses.
Drupal represents the responses it sends as Response objects.
Drupal’s responses are Symfony Response objects.
Symfony’s documentation also applies to Drupal.
Code Snippet
RESTful Example using jQuery and core REST module
CREATE Item
var package = {}
package.title = [{'value':'t1'}]
package.body = [{'value':'b1'}]
package._links = {"type":{"href":"http://local.drupal8.org/rest/type/node/page"}}
$.ajax({
  url: "http://example.com/entity/node",
  method: "POST",
  data: JSON.stringify(package),
  headers: {
    "Accept": "application/json",
    "Content-Type": "application/hal+json"
  },
  success: function(data, status, xhr) {
    debugger
  }
})
GET Item
$.ajax({
  url: "http://example.com/node/3?_format=hal_json",
  method: "GET",
  headers: {
    "Content-Type": "application/hal+json"
  },
  success: function(data, status, xhr) {
    debugger
  }
})
GET an Item and then UPDATE Item
$.ajax({
  url: "http://example.com/node/3?_format=hal_json",
  method: "GET",
  headers: {
    "Content-Type": "application/hal+json"
  },
  success: function(data, status, xhr) {
    var package = {}
    package.title = data.title
    package.body = data.body
    package.title[0].value = 'yar'
    package._links = {"type":{"href":"http://example.com/rest/type/node/page"}}
    debugger

    $.ajax({
      url: "http://example.com/node/3",
      method: "PATCH",
      data: JSON.stringify(package),
      headers: {
        "X-CSRF-Token": "niCxgd5ZZG25YepbYtckCy7Q2_GL2SvMUY5PINxRAHw",
        "Accept": "application/json",
        "Content-Type": "application/hal+json"
      },
      success: function(data, status, xhr) {
        debugger
      }
    })
  }
})
Drupal protects its REST resources from CSRF attacks by requiring a X-CSRF-Token request header to be sent when using a non-safe method. So, when performing non-read-only requests, that token is required.
Such a token can be retrieved at /session/token.
GET an Item and then UPDATE Item with CSRF token.
$.ajax({
  url: 'http://example.com/session/token',
  method: 'GET',
  success: function(token) {
    var csrfToken = token;

    $.ajax({
      url: "http://example.com/node/3?_format=hal_json",
      method: "GET",
      headers: {
        "Content-Type": "application/hal+json"
      },
      success: function(data, status, xhr) {
        var package = {};
        package.title = data.title;
        package.body = data.body;
        package.title[0].value = 'yar';
        package._links = {"type":{"href":"http://example.com/rest/type/node/page"}};
        debugger

        $.ajax({
          url: "http://example.com/node/3",
          method: "PATCH",
          data: JSON.stringify(package),
          headers: {
            "X-CSRF-Token": csrfToken,
            "Accept": "application/json",
            "Content-Type": "application/hal+json"
          },
          success: function(data, status, xhr) {
            debugger;
          }
        });
      }
    });
  }
});
DELETE Item
$.ajax({
  url: "http://example.com/node/3",
  method: "DELETE",
  headers: {
    "Accept": "application/json",
    "Content-Type": "application/hal+json"
  },
  success: function(data, status, xhr) {
    debugger
  }
})
Cron is a daemon
Cron is a daemon that executes commands at specified intervals.
These commands are called "cron jobs".
Cron is available on Unix, Linux, and Mac servers.
Windows servers use a Scheduled Task to execute commands.
The actual "cron job" is a time-triggered action that is usually (and most efficiently) performed by your website's hosting server, but can also be configured by a remote server or even from your desktop.
Code Snippet
function mymodule_cron() {

  // Short-running operation example, not using a queue:
  // Delete all expired records since the last cron run.
  $expires = \Drupal::state()->get('my_module.last_check', 0);
  $request_time = \Drupal::time()->getRequestTime();
  \Drupal::database()
    ->delete('my_module_table')
    ->condition('expires', $expires, '>=')
    ->execute();
  \Drupal::state()->set('my_module.last_check', $request_time);

  // Long-running operation example, leveraging a queue:
  // Queue news feeds for updates once their refresh interval has elapsed.
  $queue = \Drupal::queue('my_module.feeds');
  $ids = \Drupal::entityTypeManager()
    ->getStorage('my_module_feed')
    ->getFeedIdsToRefresh();
  foreach (Feed::loadMultiple($ids) as $feed) {
    if ($queue->createItem($feed)) {

      // Add timestamp to avoid queueing item more than once.
      $feed->setQueuedTime($request_time);
      $feed->save();
    }
  }
  $ids = \Drupal::entityQuery('my_module_feed')
    ->accessCheck(FALSE)
    ->condition('queued', $request_time - 3600 * 6, '<')
    ->execute();
  if ($ids) {
    $feeds = Feed::loadMultiple($ids);
    foreach ($feeds as $feed) {
      $feed->setQueuedTime(0);
      $feed->save();
    }
  }
}
Select Element, its more hard to deal with Ajax
Drupal Form Select element is harder to deal with when desired to add to it Ajax activities
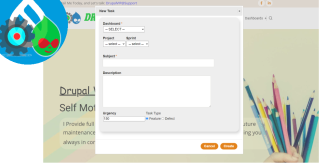
Ajax is a bit misleading, it's not all on the client side, and if we still want to handle it from the code which is located on the server, e/s program it with the form objects like $form & $form_state it still needs to update the server side within the flow, and the form is still need to have synchronization transactions between the client, server, and cache
not enough documentation on that, especially when working with specific elements like SELECT
Code Snippet
    public function buildForm(array $form, FormStateInterface $form_state, $dashboard = 0, $project=0, $sprint=0, $redirect='') {  //
      $config = \Drupal::config('drupalvip_task.settings');
      $log = $config->get('log');
      ($log)? \Drupal::logger("drupalvip_task")->debug(__FUNCTION__ . ": START "):'';
      ($log)? \Drupal::logger("drupalvip_task")->debug("Form Args: da[$dashboard] pr[$project] sp[$sprint] rd[$redirect]"):'';

      $form['redirect'] = array(
          '#type' => 'value',
          '#value' => $redirect,
      );

      //dashboard select
      $dashboard_default = ($dashboard==0) ? null : $dashboard;
      $dashboard_options = DashboardController::getDashboards();
      $form['dashboard_select'] = [
        '#type' => 'select',
        '#title' => t('Dashboard'),
        //'#name' => 'dashboard-select',  <-- prevent the form_state to update
        '#options' => $dashboard_options,
        '#sort_options' => TRUE,
        '#required' => TRUE,
        '#empty_option' => "-- SELECT --",
        '#size' => 1,
        '#default_value' => $dashboard_default,
        '#attributes' => [
          'class' => ['use-ajax'],
          //'id' => "edit-dashboard-select", <-- this prevent the callback
        ],
        '#ajax' => [
          'callback' => '::submitFormDashboardSelected',
          'wrapper' => 'group-select-wrapper',
          'suppress_required_fields_validation' => TRUE,
        ],
      ];

      $form['group'] = [
        '#type' => 'fieldgroup',
        '#prefix' => '<div id="group-select-wrapper">',
        '#suffix' => '</div>',
      ];
        $options[0] = "-- select --";
        $form['group']['project_select'] = [
          '#type' => 'select',
          '#title' => $this->t('Project'),
          '#options' => $options,
          '#limit_validation_errors' => [],
          //'#empty_option' => "-- select --",
          '#size' => 1,
          '#default_value' => 0,
        ];
        if ($dashboard > 0) {
          $project_options = DashboardController::getProjects($dashboard);
          $project_options_2 = $options + $project_options ;
          $form['group']['project_select']['#options'] = $project_options_2; //$project_options;
          $form['group']['project_select']['#default_value'] = $project;
        }

        $form['group']['sprint_select'] = [
          '#type' => 'select',
          '#title' => $this->t('Sprint'),
          '#options' => $options,
          '#limit_validation_errors' => [],
          //'#empty_option' => "-- select --",
          '#size' => 1,
          '#default_value' => 0,
        ];
        if ($dashboard > 0) {
          $sprint_options = DashboardController::getSprints($dashboard);
          $sprint_options_2 = $options + $sprint_options ;
          $form['group']['sprint_select']['#options'] = $sprint_options_2;
          $form['group']['sprint_select']['#default_value'] = $sprint;
        }

      $form['subject'] =  [
        '#type' => 'textfield',
        '#title' => $this->t('Subject'),
        '#required' => TRUE,
        '#attributes' => [
          //'id' => "task-subject-box",
        ],
      ];

      $form['actions'] = [
        '#type' => 'actions',
        '#attributes' => [
          'class' => ['form_actions'],
        ],
      ];
        $form['actions']['cancel'] = [
          '#type' => 'submit',
          '#value' => $this->t('Cancel'),
          '#attributes' => [
            'class' => ['button','use-ajax','form-submit-modal','action-cancel' ],
          ],
          '#ajax' => [
            'callback' => [$this, 'submitFormClose'],
            'event' => 'click',
          ],
        ];
        $form['actions']['create'] = [
          '#type' => 'submit',
          '#value' => $this->t('Create'),
          '#attributes' => [
            'class' => ['button','use-ajax','form-submit-modal','action-create' ],
          ],
          '#ajax' => [
            'callback' => [$this, 'submitFormCreate'],
            'event' => 'click',
            'onclick' => 'javascript:var s=this;setTimeout(function(){s.value="Saving...";s.disabled=true;},1);',
          ],
        ];

      $form['#attributes']['class'][] = 'drupalvip_form';
      $form['#attached']['library'][] = 'drupalvip_task/content';
      $form['#attached']['library'][] = 'core/drupal.dialog.ajax';
      $form['#attached']['library'][] = 'core/drupal.ajax';
      $form['#attached']['library'][] = 'core/jquery.form';

      ($log)? \Drupal::logger("drupalvip_task")->debug(__FUNCTION__ . ": RETURN FORM "):'';
      return $form;
    }
Select Element with AJAX updating form dynamically
Using AJAX callbacks to dynamically react on user input, alter form elements, show dialog boxes or run custom Javascript functions.
Ajax is the process of dynamically updating parts of a page's HTML based on data from the server without requiring full page refresh. You can find events triggering Ajax requests all over Drupal.
Code Snippet
<?php
  namespace Drupal\drupalvip\Form;

  use Drupal\Core\Form\FormBase;
  use Drupal\Core\Form\FormStateInterface;

  class AjaxForm extends FormBase {

    public function getFormId() {
      return 'mymodule_ajax_form';
    }

    public function buildForm(array $form, FormStateInterface $form_state) {
      $triggering_element = $form_state->getTriggeringElement();

      $form['country'] = [
        '#type' => 'select',
        '#title' => $this->t('Country'),
        '#options' => [
          'serbia' => $this->t('Serbia'),
          'usa' => $this->t('USA'),
          'italy' => $this->t('Italy'),
          'france' => $this->t('France'),
          'germany' => $this->t('Germany'),
        ],
        '#ajax' => [
          'callback' => [$this, 'reloadCity'],
          'event' => 'change',
          'wrapper' => 'city-field-wrapper',
        ],
      ];

      $form['city'] = [
        '#type' => 'select',
        '#title' => $this->t('City'),
        '#options' => [
          'belgrade' => $this->t('Belgrade'),
          'washington' => $this->t('Washington'),
          'rome' => $this->t('Rome'),
          'paris' => $this->t('Paris'),
          'berlin' => $this->t('Berlin'),
        ],
        '#prefix' => '<div id="city-field-wrapper">',
        '#suffix' => '</div>',
        '#value' => empty($triggering_element) ? 'belgrade' : $this->getCityForCountry($triggering_element['#value']),
      ];

      return $form;
    }

    public function reloadCity(array $form, FormStateInterface $form_state) {
      return $form['city'];
    }

    protected function getCityForCountry($country) {
      $map = [
        'serbia' => 'belgrade',
        'usa' => 'washington',
        'italy' => 'rome',
        'france' => 'paris',
        'germany' => 'berlin',
      ];
      return $map[$country] ?? NULL;
    }

    public function submitForm(array &$form, FormStateInterface $form_state) {  }

} // end of class
Drupal has adopted Ajax, review how it implemented in Forms
Drupal has adopted Ajax - full integration
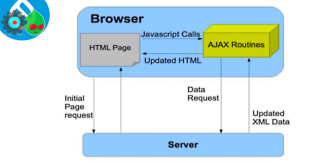
Ajax is the process of dynamically updating parts of a page's HTML based on data from the server.
When a specified event takes place, a PHP callback is triggered, which performs server-side logic and may return updated markup or JavaScript commands to run.
After the return, the browser runs the JavaScript or updates the markup on the fly, with no full page refresh necessary.
Many different events can trigger Ajax responses, including Clicking a button, Pressing a key, Moving the mouse
Code Snippet
$response = new AjaxResponse();
$response->addCommand(new ReplaceCommand('#edit-date-format-suffix', '<small id="edit-date-format-suffix">' . $format . '</small>'));
return $response;
'#ajax' => [
'callback' => 'Drupal\config_translation\FormElement\DateFormat::ajaxSample',
'event' => 'keyup',
'progress' => [ 'type' => 'throbber', 'message' => NULL, ],
],


